Installing git and setting up a new repository
Install git
You can head over to Getting Started Installing Git to see how you need to install git.
If you’re on a Mac, it’s as simple as typing git —version in your terminal
git --versionIf you don’t have it installed, it will prompt you to install it. Follow the prompt to install.
For Windows - Head over to the Windows download. Choose your specific version, download, and run the installer.
Check for a version in your terminal
Next you’ll want to run git —version to see what version of git you have installed.
git --versionIf you have git installed properly, you’ll see

If you don’t see a version after installing
If you don’t see a version when running git —version or see something like “command not found,” then you can try a few things:
- Completely close and reopen your terminal
- Try the installer again
- Restart your computer
- * Make sure your PATH is pointing at your Git installation
This will probably fix it most of the time.
2 - Setting up your first repo
- Navigate the folder you want to create your repo
- Run git init
git initYou should see it say “Initialized empty Git repository”

If so, you’re ready to hook your local git repository up to your remote.
Create your Github repo to connect to
If you already have a Github repo ready to go, you can continue onto the next step…otherwise continue following these steps.
Login to your Github/Bitbucket/etc account, and go to “Repositories > New.”
Add a value for “Repository name.”
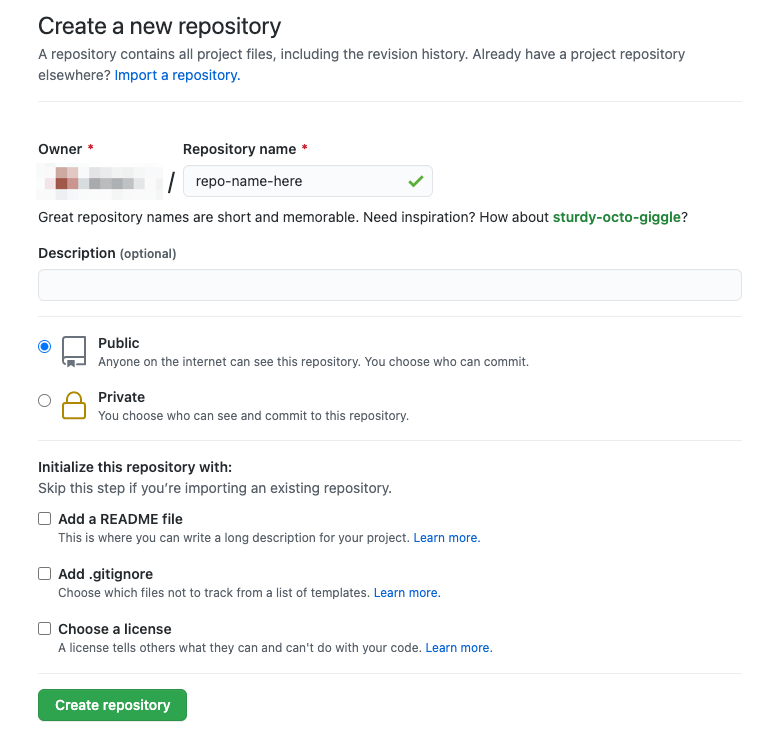
Additional options:
- Description: It really helps to add a repo as sometimes you’ll have so many and you won’t know what they do (unless you create a proper README)
- Initialization options
- Add a README file: Not necessary, but something I will cover in another post
- Add .gitignore: Again, not necessary right now - But something you will definitely be using in all of your repos (especially if you’re sharing repos or have code that’s visible to others)
- Choose a license*: Again not something that’s required right now, but we’ll cover this at another time as well.
Go ahead and “Create repository.”
Connect your local repo to your remote repo
Once the repo is created, it will give you instructions on how to connect to it.
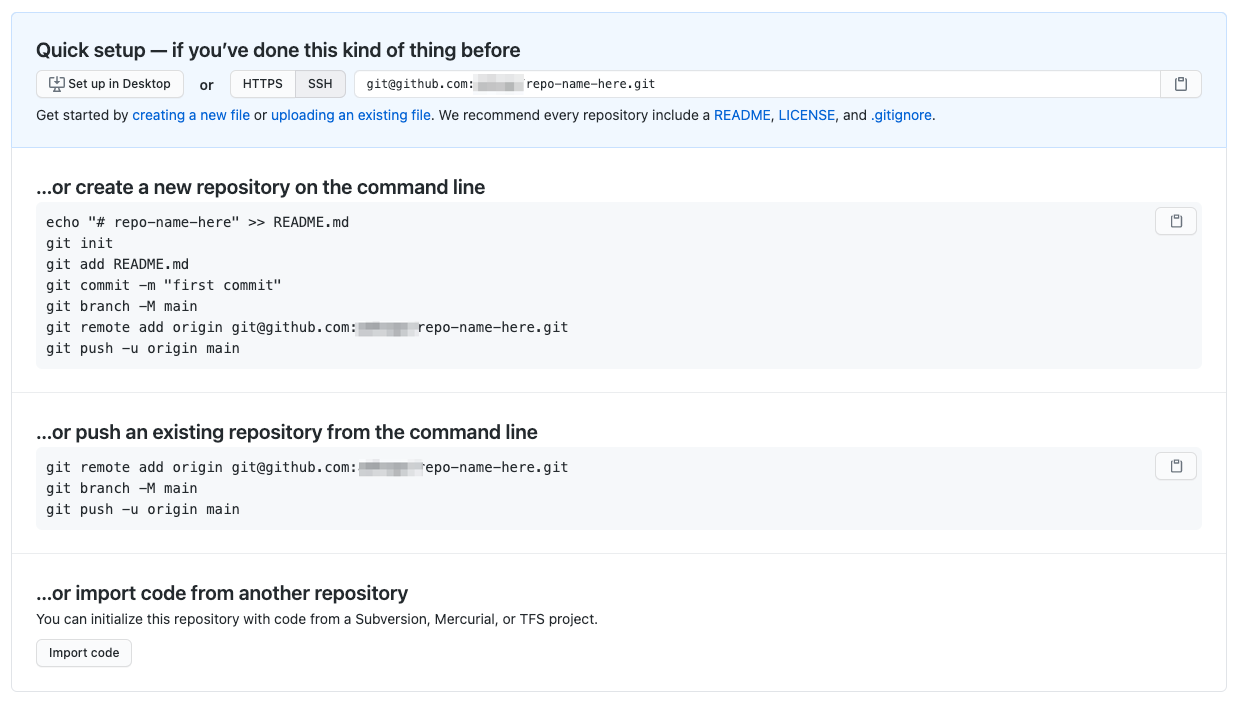
Since you’ve already created your repo locally, you’re looking at the second options where it says “…or push an existing repository from the command line.”
Go ahead and copy the top git remote add origin git… command in that section and paste it into your terminal, press enter. You won’t see any output from the command line other than the command went through. To check your remote:
git remote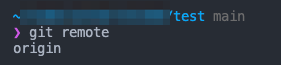
It should now say “origin.”
If you want to make sure you’re connected to the right remote, you can run git remote -v to see that you have access to fetch/push to origin at your remote repo.

This means your local repo is now connected to your remote repo and you can push/pull code to/from the repo.
Add your first commit
Since you’re connected to your repo, go ahead and make a change to a file and push it up to your remote repo.
Create a new file test.html and add some sample text test.
Add test.html
git add test.html
git status
This prepares the file to be added to your repo. You’ll see “Changes to be committed,” which means all you need to do is add a commit message and push to your repo.

Go ahead and add the commit message
git commit -m "Initial commit with test file"
Now all you have to do is…
git push -u origin mainThis will push your test file with the commit message up to your remote repo on the main branch.
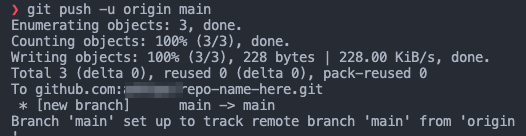
Go ahead and refresh your browser repo page and you’ll see the view has changed.
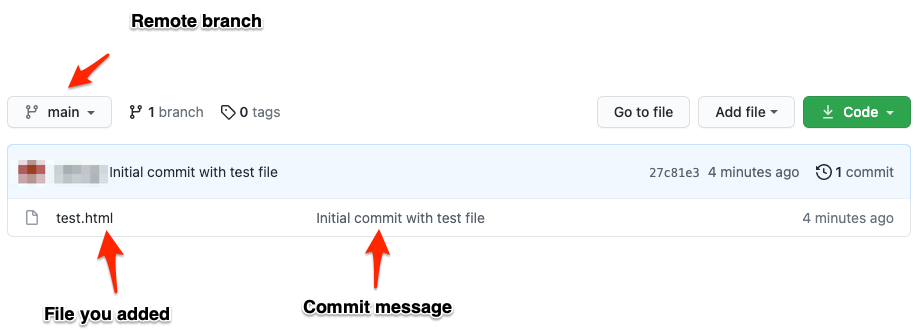
That’s it!
You’ve:
- Setup a local repo
- Created a repo in Github
- Added some changes
- Pushed your changes to Github
Now you can work on your code as you like and push/pull as needed.